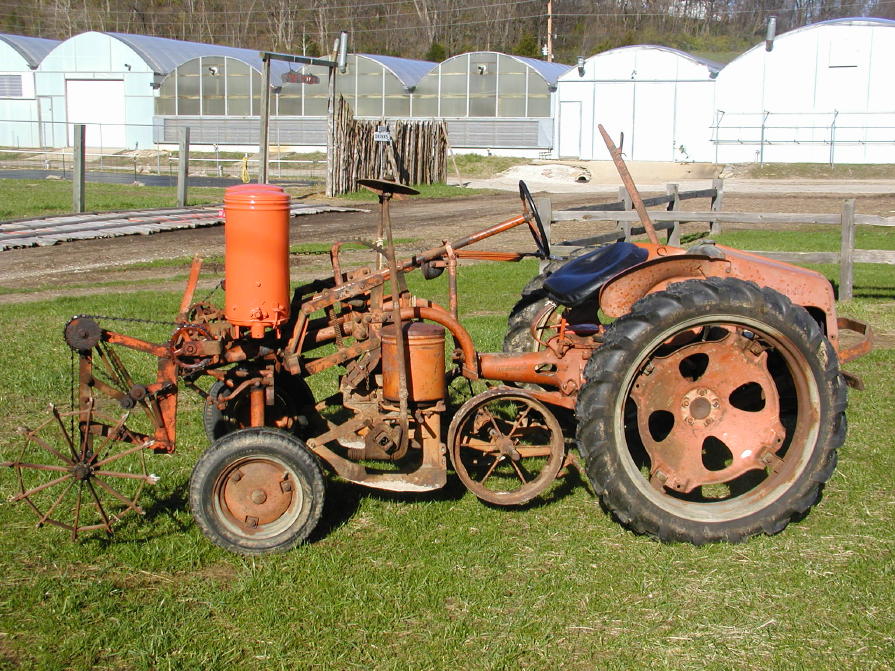
1949 AC G
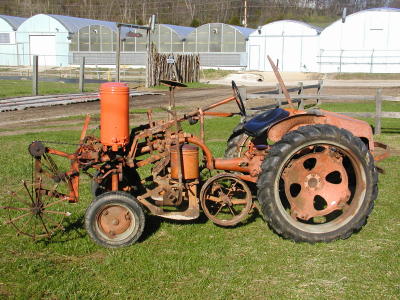
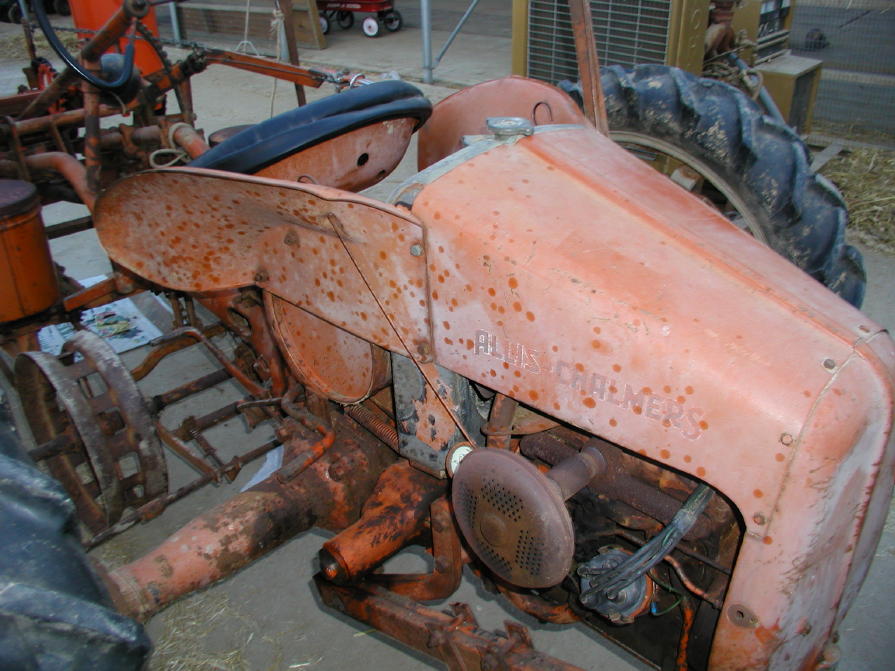
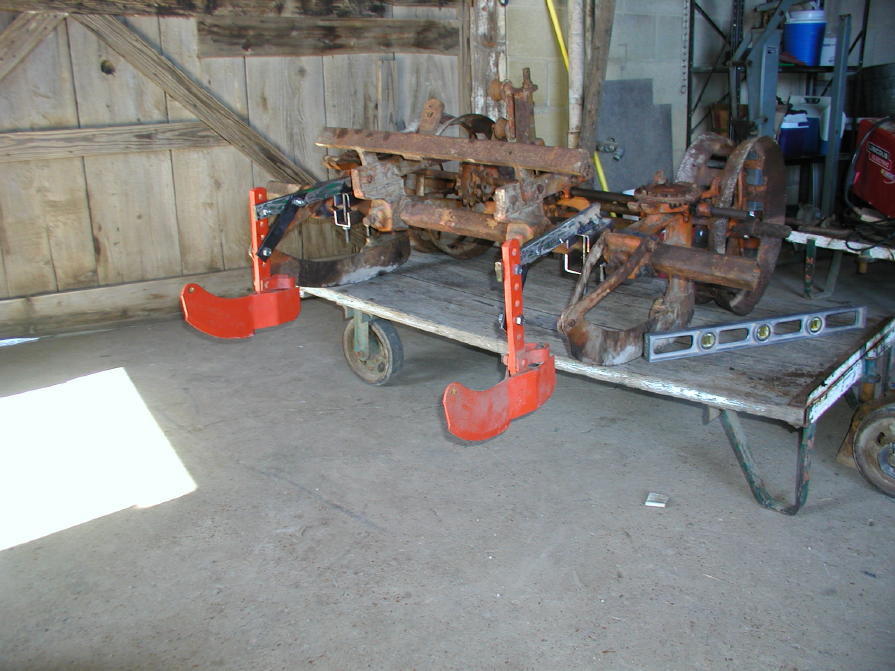
I am currently restoring this tractor. A little history of this tractor. I bought the tractor in November 2004 at the Dennis Franke sale in Columbia, IL. I drove from the sale to Mel Stuckmeyer’s farm in Columbia, IL. Mel is a cousin of my Father-In-Law Ralph Stuckmeyer. Mel looked at the tractor and said he thinks the tractor was his! He said he sold an AC G to Dennis Franke. Mel went on to say the tractor actually came from Keller’s Nursery in St. Louis. Keller’s Nursery was owned by Ralph and Mel’s Uncle, Emil Keller. I bought the tractor and also the two row corn planter at Dennis’s sale. The two row fertilizer attachment came from a sale in Bloomington, IL. I had to find the seed hoppers on the internet for the corn planter. They came out of Kansas.

Below are picture of the tear down. We power washed the tractor with hot water pressure washer to remove all the grease and grime. Even, Kyle my eight year old son helped.
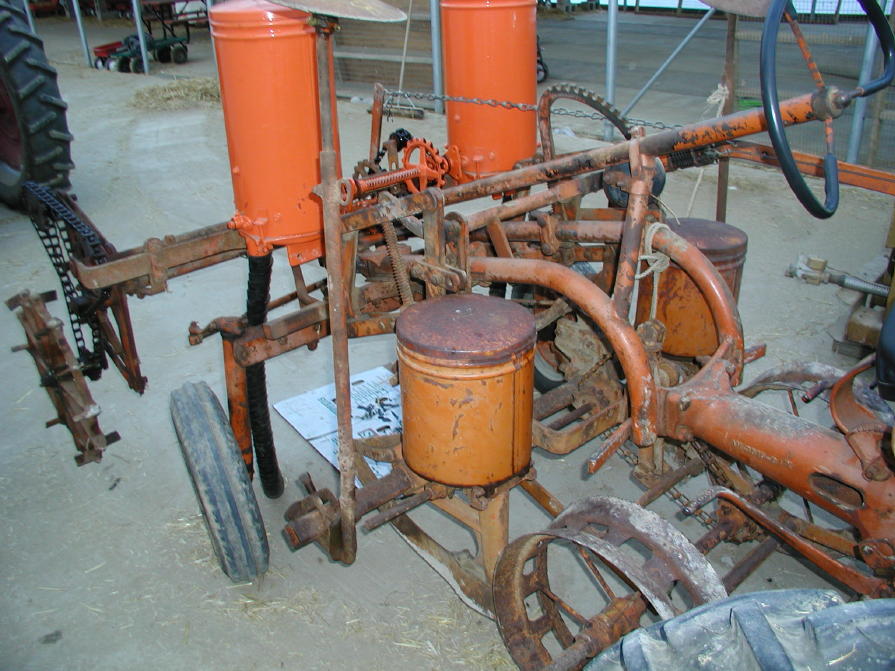
I was able to find all the parts for the tractor to make it original. It took me a couple of weeks of searching the internet, hardware stores and even tractor parts counters before I ended up finding the lift assist spring for the corn planter. The only item I could not find was the brackets to attach the fertilizer openers on the corn planter tool bar. Ralph ended up welding a customized version which I think will really look nice.
Here are the pictures before and after getting the tractor sand blasted. I decided to try something different this time. The last AC G I restored in 1999, I did everything including sand blasting and painting. But with all the farm activities needing to be done, greenhouses, vegetable farming, Halloween, etc. I decided the have someone else do the sand blasting and painting. Without the proper equipment it is pretty hard to paint a tractor. Plus the temperature needs to be above 70 degrees and low humidity. And when we do get this kind of weather, I definitely can not afford to be taking time off to “playing with tractors!”
After getting the tractor engine put back together and running, I had a few set backs. Prior to starting the tear down, I had checked and fixed all leaks. The radiator was good and it did not leak. But….After getting everything put back together, the radiator developed a small leak. I tried putting “stop leak” in the radiator, but it did not work I then had to take the radiator to a shop and then it will have to be repainted. But that was not my worst problem….Somehow the clutch would not disengage. Even though AC G are prone to having the clutch stick to the flywheel, usually you can pull the tractor in gear and press the clutch and it will free it’s self. But this was not the case. So here are pictures of having to pull the engine!
The last picture ABOVE is a picture of the clutch.
I was able to free the clutch from the flywheel. I adjusted the clutch and bolted the tractor back together. This was a learning experience. I first split the tractor behind the transmission and had oil everywhere. This only caused me to have to replace two seals. I think I need to write the editors of the shop repair manual on where to split the tractor!
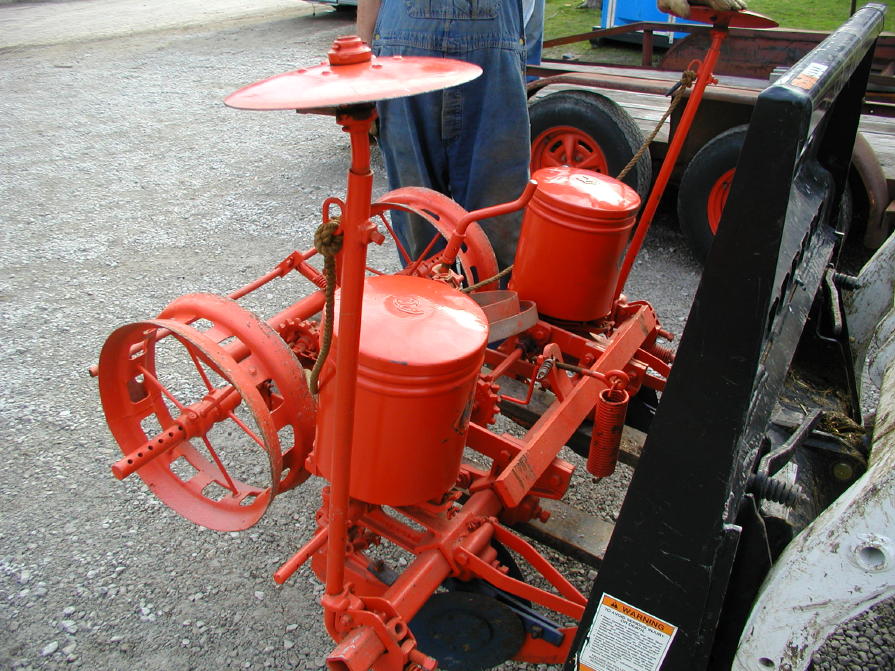
ONE DAY LATER: These sets of pictures show the tractor after I had to fix the clutch (turned into an all day job). I am still waiting on a few pieces from the body shop. The tires, rims and wheels are still being painted. I just used a old set to move tractor around. Also, notice that both fertilizer hoppers are smooth on the front, no seam going down the middle. Well, after I got the hoppers back from the paint shop, I noticed that one of the hoppers had the seam on the front and one was on the back! The only problem is that I have to put a decal on the front of the hopper, right where the seam is! So I had to take the hopper apart and turn it around. I think it looks better this way. Now after looking at some very old sales literature it shows one hopper with the seam and one without. I guess at the factory they put all of them together the same way!